
One of my favorite (because it's quick and elegant!) recipes is chocolate dipped fruit: apples, pineapples, strawberries and whole bananas which I sprinkle with chopped nuts and freeze--that's for another time. For now let's concentrate on the lovely strawberries. Strawberries have been on sale at every grocery store for the past few weeks in my neck of the woods. Some stored did indeed try to pass off some white necked ones but I knew better. Always go for the fully ripped ones that are bright luscious red from the bottom to top and firm not squishy! This dessert pairs so well with wine and cheese plus it's super expensive pre-made at the stores and online-- it's ridiculous to me why I wouldn't make these myself for 1/3rd of the price.
Ingredients (makes 50 depending on size of berries):
2 lbs of fresh ripped strawberries
1 pk each of white, milk and dark chocolate (I like to use the bagged chocolate with the heaviest % of cocoa when applicable)
3 Tablespoons of heavy cream
3 teaspoons of butter
Directions:
Thoroughly wash and dry your strawberries. I mean completely dry--no moistness at all otherwise it will mess with the chocolate when drying and you'll get those strange dusty chocolate marks on your berries. The goal here is to get a unified chocolate color.

Time to temper (melt) your chocolate. As you're berries are drying, fill skillets with 1/3 to 1/2 full of water and bring to a simmer. Or use a double boiler. I don't have one and made do with what I have on hand. Once you have a nice hot simmer going (The optimal temperature to melt bittersweet and semisweet chocolate 122°F/50°C, for milk and white chocolate it's 105°F/40°C), add cream and butter and chocolate chips/chunks or shavings into bowls. Place filled bowls into the hot water. Remember a simmer not a boil! If your water is too hot it'll ruin your chocolate by making it separate and cook too much and you'll have to start again. Fill metal or heatproof bowls with each type of chocolate.


Place your trays in the freeze for about 10 to 15 minutes to help the chocolate set. Time to drizzle. Now fill piping bags fitted with a small tip with the leftover melted chocolate. In a pinch you can use a plastic sandwich bags and clip a tiny bit of the corner off. Now go to town and drizzle. Place back into the fridge to set for at least 30 minutes. When they are chilled, arrange on a tray and serve. Leftover strawberries should be stored in the perforated plastic containers they came in. Just be sure to wash and dry the containers first.

Ingredients (makes 50 depending on size of berries):
2 lbs of fresh ripped strawberries
1 pk each of white, milk and dark chocolate (I like to use the bagged chocolate with the heaviest % of cocoa when applicable)
3 Tablespoons of heavy cream
3 teaspoons of butter
Directions:
Thoroughly wash and dry your strawberries. I mean completely dry--no moistness at all otherwise it will mess with the chocolate when drying and you'll get those strange dusty chocolate marks on your berries. The goal here is to get a unified chocolate color.
Time to temper (melt) your chocolate. As you're berries are drying, fill skillets with 1/3 to 1/2 full of water and bring to a simmer. Or use a double boiler. I don't have one and made do with what I have on hand. Once you have a nice hot simmer going (The optimal temperature to melt bittersweet and semisweet chocolate 122°F/50°C, for milk and white chocolate it's 105°F/40°C), add cream and butter and chocolate chips/chunks or shavings into bowls. Place filled bowls into the hot water. Remember a simmer not a boil! If your water is too hot it'll ruin your chocolate by making it separate and cook too much and you'll have to start again. Fill metal or heatproof bowls with each type of chocolate.
Be patient and don't jump the gun by trying to stir the chocolate too soon. Wait until you can see the all of chips or chunks glisten/shine. Now stir. Once it's nice and smooth, turn off the heat and get ready to dip.
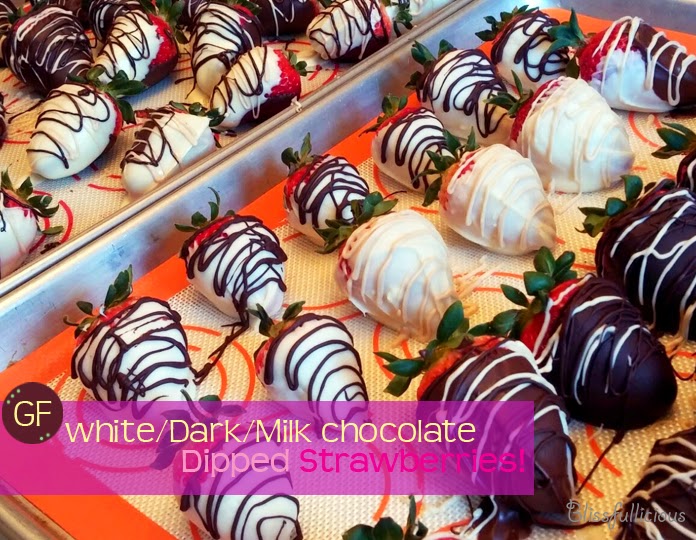
Line a 2 baking trays with wax paper or Silpat mats. Gently dip each strawberry by grasping the tops with 2 fingers and dipping. Swirl the strawberry as you dip to coat all sides.
Lay each berry on tray and continue dipping your berries.
Place your trays in the freeze for about 10 to 15 minutes to help the chocolate set. Time to drizzle. Now fill piping bags fitted with a small tip with the leftover melted chocolate. In a pinch you can use a plastic sandwich bags and clip a tiny bit of the corner off. Now go to town and drizzle. Place back into the fridge to set for at least 30 minutes. When they are chilled, arrange on a tray and serve. Leftover strawberries should be stored in the perforated plastic containers they came in. Just be sure to wash and dry the containers first.


