Thursday, October 31, 2013

Basic Gluten Free Yellow Cornbread


Gosh I love my all-purpose brown rice flour blend. I made a huge pot of homemade black bean beef & jalapeno chicken sausage sweet potato chili  (check back for I'll post the recipe soon enough) and of course a pan of cornbread. Being that I've never made gluten free cornbread before I was alittle worried; just a tad, that it would be spongy. I was wrong. Moist and fluffy cornbread was to be had by all. It was pretty simple dimple. I followed the recipe on the back of my Albers Corn Meal box and substituted the all-purpose with the brown rice all purpose recipe I treasure from King Arthur flour. I did add some xantham gum to the batter and a drizzle of maple syrup and butter to the top but that's it! Next time I'll put in some chopped up jalapenos, green onions and perhaps some cheese. :) This gluten free thing isn't too hard, now is it?

Ingredients (adapted from Albers)

1 cup GF Yellow Corn Meal
1 cup all-purpose brown rice mix

1 teaspoon xantham gum
1/4 cup granulated sugar
1 Tbsp. baking powder
1 tsp. salt
1 cup milk
1/3 cup vegetable oil
1 large egg, lightly beaten

1 tablespoon butter (for top)

Optional: 
drizzle of maple syrup (for top)
1/3 cup jalapeno, seeded and diced 
1/2 cup cheese (cheddar or Pepper Jack), shredded 
1 stalk green onions, sliced thin

Directions:

Preheat the oven to 400° degrees and grease 8-inch square baking pan.

In a medium mixing bowl, whisk together corn meal, gf all purpose mix, xantham gum, sugar, baking powder and salt.


 Add milk, oil and egg; mix well. 


Pour into prepared pan.

BAKE for 15 minutes than spread butter and drizzle maple syrup on top. Bake for another 10 to 15 minutes or until golden brown and toothpick comes out clean. 


Wednesday, October 30, 2013

Let's talk pasta. Specifically brown rice versus corn.


One of the items most people reminisce about is the pasta they'll miss out on when starting their gluten-free journey. At first I admit I panicked. I'm a pasta gal! I took every opportunity to go to different stores and made mental notes at their offerings. It wasn't much. But alas Trader Joe's had me covered. I know I mention them often but there's a reason, they have the goods my friends. I found these beautiful corn and brown rice based spaghetti noodles, penne and fusilli pastas all neatly arranged in the normal pasta aisle. They didn't have them tucked discreetly away on a tiny dedicated self of gluten free goods like so many other stores--I'm not "special." No, they understand and I heart them for it. I scooped up 2 packages of each. 

That night we tried the corn spaghetti it was a bit tricky--I won't lie. I couldn't tell when it was finished cooking! I did follow package directions like a good girl but being new to gluten free it was, well.......weird! What's with the cloudy water? Why was it so gooey looking (no I didn't over cook), I taste tested and okay it was good. However, 2 days later when I decided to have some leftover for lunch and reheated it..........BLAH! It was clumpy and a hardened mess. Not good. 

Then we (haha! "we" like anyone else in this house cooks!) substituted the brown rice penne for macaroni noodles in classic mac and cheese--it worked and reheated wonderfully! Yippee Skippee! Since then we have gone with only brown rice pasta and it hasn't disappointed  I cook the pasta about 8 minutes past the instructions on the package because if I follow those directions, it's too al dente for my taste. 

Here is the recipe for Seafood pasta (think seafood fettuccine that I'm so overjoyed about STILL being able to make and eat. 

Ingredients:

2 cups heavy whipping cream
1 package brown rice penne pasta (or any type you like)
2 garlic cloves, minced
2 tablespoons butter
1/2 small yellow onion, minced
1 tablespoon fresh minced parsley or 1 tsp dried
1/2 teaspoon oregano, fresh or dried
1 cup Parmesan cheese, grated plus 1/2 cup for garnish
1 pound mussels, not frozen
1 1/2 cup salmon or cod, cubed
1 pound black tiger shrimp, peeled and de-veined
1/2 large lemon, zested
lemon wedges
sea salt & black pepper to taste
1 tablespoon cornstarch, if needed
1/2 cup cremini mushrooms, sliced (optional)

Directions:

Cook the pasta until you think they're done. . .or package directions. :) Drain and set aside.

Saute the garlic and onions in small skillet, set aside.

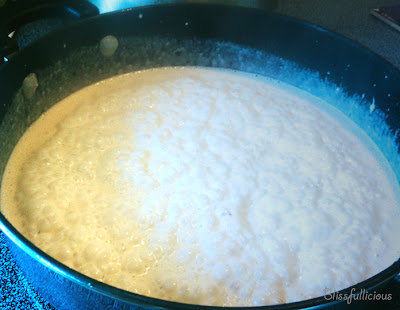
In large pan/skillet melt the butter then add the heavy whipping cream and bring to a boil. Once it's boiling add in 1 cup of Parmesan cheese and mix. The cheese will aid in thickening the sauce as well as add that yummy flavor we all love.  Keep stirring on medium high heat until the bubbles become rather large (about 5 minutes). 


Turn down the heat to medium. Add the pasta and toss. Add salt and pepper, parsley and oregano.


Add the salmon/cod and mix. 


Add the mussels (make sure the mussels are closed. Place a lid onto the pan for 10 minutes (also if adding mushrooms) do so now. The mussels should be opening. If not, replace lid for another 5 minutes. Discard any that haven't opened, cause they're gondi (dead). Add the shrimp and toss. The shrimp will become opaque when they're cooked through. Squeeze 2 wedges of lemon and toss. Sprinkle the lemon zest and more Parmesan cheese over the pan or over the plate when serving, don't forget the lemon wedge. Enjoy cause it's yummy!


Pandan Mochi Cake


I was looking over this blog's stats today and noticed that at least 6 times a week my Durian Coconut Mung Bean Cake recipe is read at least 6 times a week. I remember seeing my photos for the pandan version of this cake and figured I would go ahead and post the pics and corresponding recipe. It makes me smile to think that people are trying and enjoying the other recipe. Especially since it has durian in it. While pandan is very flavorful it isn't pungent like durian, pandan has a rather sweet vanilla almondish scent and taste and is found in many Vietnamese desserts.


Ingredients:

1 pound mochiko (glutinous rice flour)
2 cups white sugar
2 teaspoon baking powder
1/2 cup butter, melted
1 can coconut Milk
1 can evaporated Milk
1/2 cup water or milk
5 eggs
1 teaspoon vanilla extract
1/2 cup sweetened, flaked coconut
1 cup steamed yellow mung bean
1 tablespoon pandan extract


Directions:

If you can't find pre-steamed mung beans at the International grocers, buy dried yellow mung beans. Take about 1/2 cup dried yellow mung bean and steam in rice cooker or over stove. They will double in size when cooked. Approximately 20 minutes.


Preheat the oven to 350 degrees. Lightly grease a 9x13 inch baking dish. 

In a medium mixing bowl, add flour, eggs, vanilla, butter, water and evaporated & coconut milks, mix. Add baking powder, sugar, vanilla, pandan extract and whisk. Mix in the coconut and mung bean.


Pour into prepared pan and on middle rack of preheated oven. 

Bake for 1 hour. Cool for about 30 minutes. 


Cut into squares. This is best eaten warm. You can store this by wrapping in plastic wrap when cooled, but before eating, reheat the square in the microwave for about 20 to 25 seconds.